
How to Create a blog website with WordPress in 10 Minutes with Hostgator
In connection with our courses, this time we will explain how to create a blog website with WordPress CMS. Since the completion of establishing a business blog requires what we talked about in the article on how to create a blog and ways to profit from blogging, we will focus only on the aspect of hosting and the domain.

How to create a blog website with WordPress in Minutes with HostGator
1. Getting Started Choosing a Hosting Provider
The best and fastest host (for average users) is cloudways with the Vultr High-Frequency plan. Each of these hosts has its own benefits and costs (according to the latest information I have). But compared to other people, I think the pricing is a little expensive.
And the wonderful part is that we'll supply you with a link so you can save 60% off the standard purchase price. You can carry on with us if you decide to go with Hostgator. If you choose alternative hosting, you can research the procedures involved in creating it before looking for a way to subscribe to your platform.
2. Steps to create a blog website with WordPress with Hostgator
First Step: Login to the hosting site
Enter the Hostgator website, to get a 60% discount, enter this link hostgator.com/s and then click on "Get Started!". As in the picture below.
(If you will create a site at the end of the year, you can go directly to the site where you may be given a larger discount).

* If you entered the site directly after searching on it, click on Hosting at the top and then on Shared Hosting.
Second Step: Choose the domain or domain
. In this step, you will write the desired blog's heading or website, and then what you want after the point. (For example, our blog's domain is www.zayoour.com).
Do not bother with www, type the name you want for your site and then choose the desired domain (.com, .net, or other). As in the picture below.
* In case you own a domain, click on "I Already Own This Domain".

- Write a URL of your website (avoid choosing a random name or filled with numbers, choose a good name suitable for your field).
- Choose your .com domain. Or any other points you want.
- Click on the number 3.
- At the bottom, you will see the address you entered in 1 with the available domains. If “Unavailable” appears on the desired domain, the domain has been chosen by someone else before you. Replace it until you find an available domain.


* The first and automatic "Hatchling" plan is the cheapest but gives you the right to host only one website. While the "Baby" and "Business" plan is a little more expensive, but with additional features (such as an unlimited number of sites).
* In "Billing Cycle" choose the duration of the hosting purchase (the longer you choose the more discount you will get). But the more time you choose, the smaller the price you will have to pay.
* Note: If it is difficult for you to choose a term of 36 months and pay more than $100, you can choose a term of 12 months and pay a lower price.
The email address is one of the fields that must be filled in (retype it). For security, pick a password and PIN.
*Note 2: Don't be deceived; 12 months are less expensive than 6 months.
Step Five: Create Your HostGator Account

Your security PIN serves as proof that you are the account's owner. If you contact HostGator support, they will confirm the PIN after you sign in.
Step 6: insert your payment details and payment information
Then choose a kind of payment. Then the rest of its requirements.
Add the required information, which is the name and ancestry, the name of the company, if any, with the phone number, residential address, state, state, city, and zip code


* For me, I did not choose any of them because there are free add-ons that give you some of these features for free. The more you choose a service, the higher the price you will spend.
Step 8: Choose the coupon code.
The default coupon is a friend. You don't need to change it (If you possess a bigger discount code that's fine, but if the coupon increases the price you'll pay, rewrite it as "friend" or don't change it).
* If you entered directly to the site once in the final year, you will be given a coupon in another name, and it may give you a larger discount, so do not change it.

.png)
our end! You are now a HostGator subscriber! A welcome email will be sent to your registration email address with your HostGator customer portal login credentials.
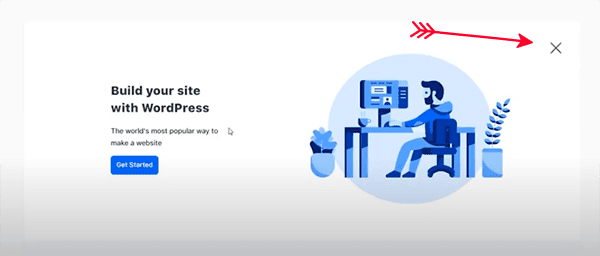
* The "Payment Completed" page will appear, wait a bit. (You may see a questionnaire, click on "Skip" below). If it appears to you as in the image below, click on the (X) mark.
You will be sent to your HostGator account dashboard.
Save the page by clicking on the star as shown by the red arrow. (or the save star if you are using a mobile phone). The direct access link to the control panel is https://portal.hostgator.com/. Then enter the password with the email you registered with.
* You will receive a message to the email you registered with from "sales@launchpad.com" where you must click on the link for verification, to verify that you own the email.
3. Install WordPress
1. Click on "Launch cPanel".
2. Go to the Software section, then click on Softaculous Apps Installer.


- Choose Protocol: The default option should be HTTPS://, assuring the security of your website with an SSL certificate. You can choose HTTPS with or without www as you wish.
- Choose Domain: Select the domain where a new installation Softaculous (your site name).
- In Directory: Normally, you will leave this blank. This field is used if you are trying to install WordPress in a subdirectory.

"Choose the version of WordPress You desire to install. in number 4 in the picture up top". Preferably using the latest version, as it will be the most secure and should be appropriate for most themes and plugins. (In the picture, the current version is 5.8.2, but you will choose the one that will be at the top, which is the latest).

- Admin Username: We suggest utilizing a different method than the default "Admin" for the username, as this is the default for all WordPress installations and poses a security risk. (must remember).
- Admin Password: You can create a password or create one with a key code. (must remember).
- Admin Email: This is where WordPress notifications will be sent, including a password reset (if you forgot your password).


